
There aren’t too many “one-lift wonders” that could make you epic by delivering a ton of advantages in a single set, however the deadlift is one in all them. The traditional deadlift gives you the potential to lift a whole lot of weight, get jacked, and brag about your massive deadlift PRs (if that’s something you’re in to).
Credit: Drazen Zigic / Shutterstock
Nonetheless, if done improperly, the deadlift can result in frustration and even injury. Neither of those results are good on your long-term performance, let alone your spinal health, so it’s time to go over the important thing components of proper deadlift form. Here’s what to do and when to do it for a stronger, safer deadlift.
Perfect Your Deadlift Form
Deadlift Setup Suggestions
A powerful and efficient deadlift begins before the load even leaves the bottom. Here’s the best way to make probably the most from each individual repetition.
Take Time to Set Your Stance
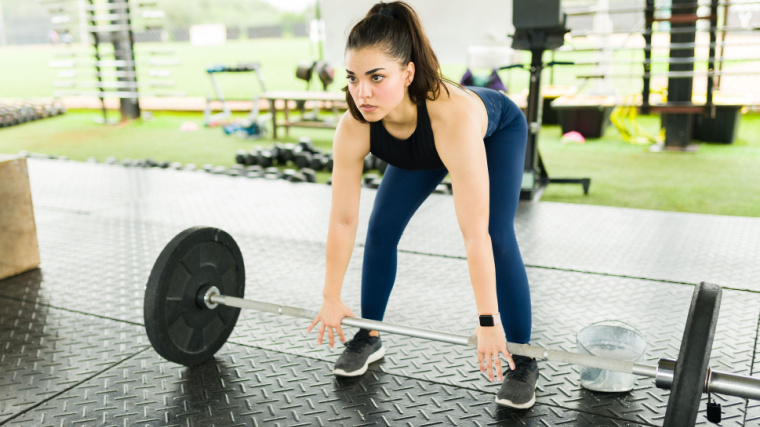
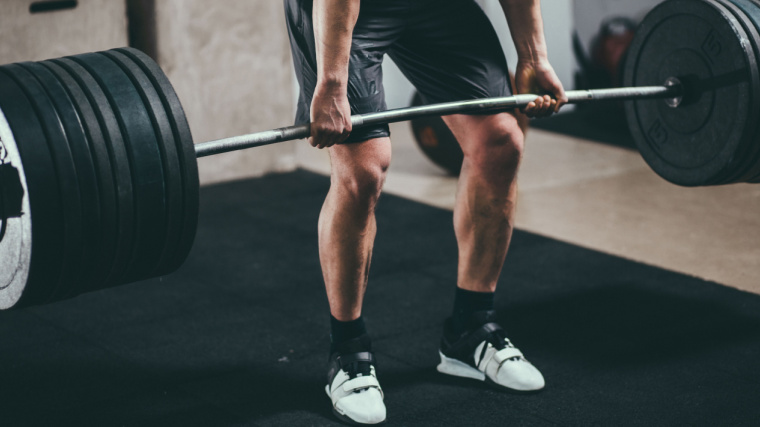
Step one in perfecting your deadlift form is to approach the bar and set your stance. For a typical conventional deadlift stance, you would like your feet relatively close together, about shoulder-width. You’ll be able to make slight adjustments to find a way to achieve the bar and pull upright while keeping good positions at your shoulders, through your back, and into your hips.
Position the barbell directly over the center of your feet, roughly where your arches are. Your shins must be near the bar, but not touching it. You shouldn’t must roll the bar toward you or away from you before starting the repetition, it must be in a great spot from the beginning.
 Credit: antoniodiaz / Shutterstock
If the bar is in front of your toes, it’ll be too removed from your centerline and also you’ll have poor leverage to tug the load. If it’s too near your ankles, the bar won’t find a way to follow a strong, vertical path because your shins and knees might be in the way in which.
Point your toes straight ahead and keep your feet flat on the bottom as you bend all the way down to grip the bar.
Select the Right Grip
Your grip is an important a part of the deadlift because it helps control the load and generate the force you wish. With out a stable grip, you may say bye-bye to most of your motor unit recruitment because your grip is the place where power transfers out of your body to the load.
There are 4 grip variations you may potentially use, depending in your experience and goals: the double-overhand grip, the mixed grip, the hook grip, and the double-overhand with lifting straps.
 Credit: Jacob Lund / Shutterstock
The double-overhand grip involves each hands gripping the barbell along with your palms facing down. That is a great grip for beginners, because it allows for even distribution of weight across your body and it helps to construct grip strength.
This can also be probably the most common grip for many lifters. In case you can use the double-overhand grip, use it. It doesn’t have any significant injury risks and it keeps the load of the bar evenly distributed. Nonetheless, some people might “outgrow” the double-overhand grip as they progress in strength. Then it could be time to make use of a mixed grip.
The mixed grip involves gripping the barbell with one palm facing down and the opposite palm facing up. These mechanics assist you to hang on to more load. This grip is usually utilized by experienced lifters within the gym and competitive powerlifters, because it allows for a safer overall grip and higher control of heavier weights.
Nonetheless, the mixed position is inherently unbalanced and also you do put yourself in danger for a biceps tear with the supinated (palm up) side because your elbow joint is more directly exposed to emphasize and the biceps muscle is put into a big stretch. (1) It also gives the bar the potential to “spin” or rotate away out of your body since the force isn’t evenly distributed across the bar.
In case you’re deadlifting for multiple reps per set, switch your mixed grip hand position every set and even pausing briefly to flip your grip with each repetition. In case you’re maxing out, hearken to your body to avoid a potentially serious biceps injury.
The subsequent alternative is the hook grip. This can be a variation of the double-overhand grip where your thumb is on the inside your fingers versus the skin. If done right, it could be one in all the strongest grips in comparison with either a double-overhand or mixed grip.
Since the hook grip uses a double-overhand position, it permits you to keep the load evenly distributed and never need to worry about mixed-grip related injuries. Nonetheless, one big drawback to the hook grip is that it’s unavoidably painful since the barbell is bearing down on the side of your thumb. Actually, in case your thumbs or hands are too small, it may not even be possible to hook grip because your fingers need to achieve fully across the bar and your thumb.
But hook grippers swear by it, though their thumbs are sometimes taped for support. Nonetheless, it’s an option and the consensus amongst avid hook grip fans is that the pain does decrease as you adapt to using this specialized grip.
Finally, you should utilize a double-overhand grip with lifting straps. Straps offer maximum support and assist you to use the heaviest load, but they take your grip strength out of the equation. That is great for individuals with smaller hands, when their grip is limiting the performance of their glutes and hamstrings.
In case you’re not concerned with constructing grip strength, or in case you’re a competitive strength athlete who can compete with lifting straps (for instance, strongman and strongwoman athletes), using straps is an awesome option without having the potential injury risk of a mixed grip or the required pain tolerance for a hook grip.
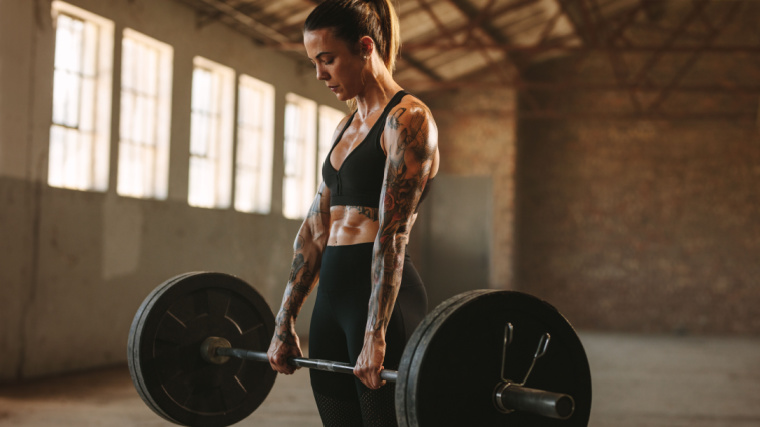
Get Your Body in Position
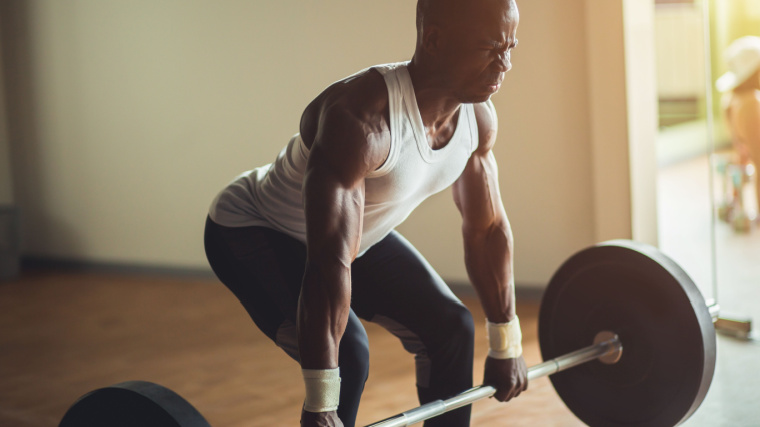
When you’ve established your grip and stance, it’s time to give attention to your overall body position. Start by bending your knees barely and “wedging” your hips into the bar, as in case you were on the brink of sit down in a chair. Keep your arms straight and get your shoulder blades back and all the way down to keep your chest up, quite than caving forward.
It is best to begin to feel your body naturally get tighter as a consequence of tension constructing out of your grip, up your arms, across your shoulders and upper back, through your torso, and down your glutes and hamstrings.
 Credit: MDV Edwards / Shutterstock
In case you’re unsure about your position, or if something feels off, record a transient video or take an image from the side for some immediate feedback. The highest of your lats (back muscles) must be over the bar. Your shoulders barely in front of the bar and better than your hips. The bar must be near your shins along with your leg barely bent (not in a deep squat position).
In case you don’t feel tight, imagine squeezing oranges underneath your armpits. That messy but accurate visualization should make it easier to to cue upper body tightness where it’s most needed — your upper back, shoulder blades, and shoulders.
Consider Switching to Sumo
In case you notice your lower back is rounding despite establishing in an otherwise ideal position, or in case you experience discomfort in your hips or spine with conventional deadlifts irrespective of the way you adjust your setup, consider switching to a sumo stance.
No, sumo deadlifts aren’t “cheating.” That joke is getting old and was never that funny to start with. There’s actually hard research showing deadlift stance comes all the way down to your structure. (2)
 Credit: MDV Edwards / Shutterstock
Based in your torso, femur, and tibia ratios, a sumo stance could be higher fitted to you. You’ll find a way to construct more strength with less joint strain by changing your stance. This might mean being weaker at it if you first start, though. Don’t let a short-term learning curve turn you away from a choice that’ll yield long-term results.
With sumo deadlifts, your grip must be about shoulder-width, as a substitute of being outside of shoulder-width with conventional deadlifts. Moreover, your stance is wider — along with your feet well-outside your shoulders — along with your toes barely identified. How wide you go relies in your comfort, leg length, and hip mobility.
If you could take a really wide stance, which can compromise your range of motion, you may put a weight plate under each foot so as to add a deficit. Apart from the grip and stance being barely different, every other lifting cue is identical as the traditional movement.
Deadlift Performance Suggestions
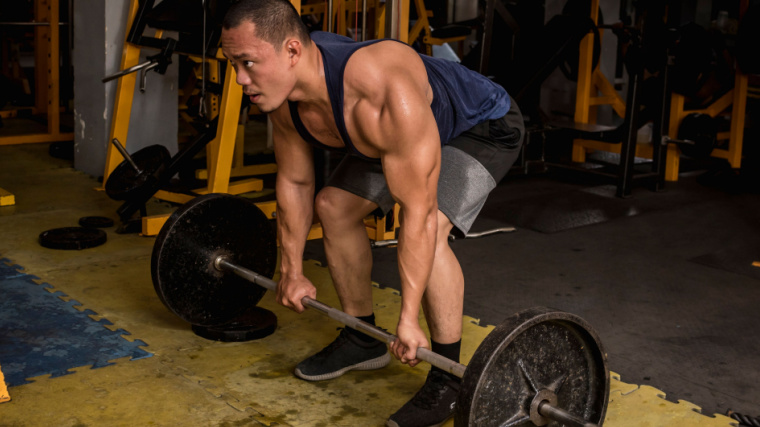
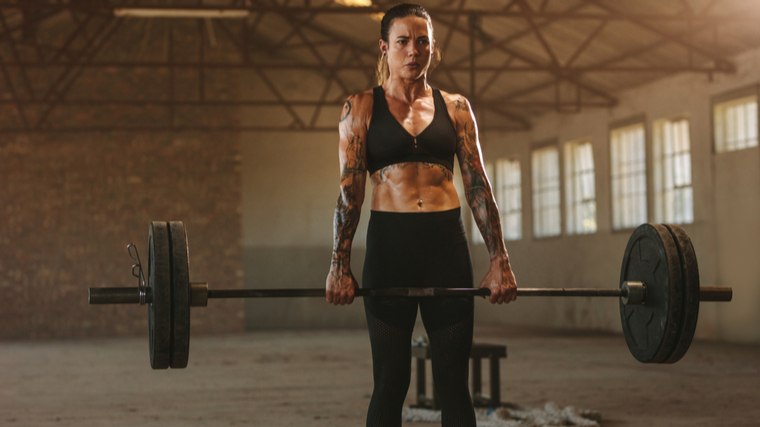
When you’re in a great position, out of your hands to your feet and every thing in between, it’s time to finally get the load off the bottom. Listed here are some cues for the concentric (lifting) phase and the eccentric (lowering phase) of the deadlift.
Lifting the Weight
With regards to actually lifting the load, there are several cues you should utilize to make sure proper form to maximise strength and safety. Keeping you back in a neutral position should go without saying, since that’s a fundamental form tip to cut back your risk of a lower back injury.
Give attention to driving through your feet and pushing your hips forward. It will help activate your quads, glutes, and hamstrings. This two-tiered approach, using your feet and hips, will allow you to give attention to probably the most efficient method to produce force with good form.
 Credit: UfaBizPhoto / Shutterstock
In case you know your way across the gym, a powerful deadlift is like leg pressing the bar off the ground — you must use a strong, flat-footed leg drive to interrupt the plates off the bottom — followed by a hip thrust into the bar once the barbell crosses above your knees. This helps you to fully recruit your glutes to complete with a powerful lockout.
Exhale at the highest of the rep if you’ve locked the load, and take an all too transient moment to shift focus onto the following phase of the repetition — returning the load to the bottom.
Lowering the Weight
Most individuals slam the weights down quickly on the eccentric portion of the rep. This may be fantastic under certain conditions, but it surely comes from the world of powerlifting. In case you aren’t planning to deadlift in a powerlifting competition, there is no such thing as a need to do that.
Generally, you must lower with control, not since it’s necessarily that much safer but, like every exercise, there’s still some training stimulus through the repetition if you lower with control. (3) Dropping the load reduces the quantity of labor your muscles are doing and will cut into your potential results.
 Credit: UfaBiaPhoto / Shutterstock
Lower the bar as in case you were doing a Romanian deadlift, keeping the bar near your body along with your knees barely bent. Feeling your muscles stretch as the load approaches the bottom could even contribute to some extra gains. (4) It must also keep the bar in the right position at the underside for a simple transition into the following rep.
Once the load is on the bottom, let it accept at the least a split-second. Don’t bounce into your next rep. It’s going to not stimulate much tension on your muscles and, worse, may lead to injury by allowing creating momentum which prevents you from properly bracing for every repetition.
Brace, Brace, Brace
As a consequence of it’s generally heavy nature, deadlifting performance and safety hinges in your ability to brace. (5) Pun intended. It’s vital to maintain your core braced from the moment you arrange, hold it into lockout, and maintain a great brace as you lower the load.
Fortunately, bracing, or keeping your core tight and stable while manipulating the load, is comparatively easy. It comes all the way down to respiratory air into your stomach quite than respiratory deeply into your chest. As you’re taking a breath in, take into consideration expanding your abs, obliques, and lower back in 360-degrees.
 Credit: Jacob Lund / Shutterstock
In case you’re wearing a lifting belt, it’s best to feel your body expand “into” the belt. Once you’re feeling tightness and pressure around your entire midsection, maintain that tightness as in case you predict to get punched within the stomach. This keeps your spine in a stable position and helps to stop your low back from rounding, which may be injurious.
There’s a subtle but crucial difference between bracing your core and easily “flexing your abs.” A braced core is solid from front to back and side to side, and promotes a protected, strong, and stable upper body. Flexed abs are simply contracted ab muscles in your midsection and might sometimes encourage a rounded torso position, which is the final thing you would like during a heavy deadlift, because the abs are answerable for spinal flexion (bending your torso forward).
Learn how to Deadlift
Here’s a concise review of the best way to display maximum strength and efficiency with crisp technique through the conventional deadlift.
Step One — Find Your Stance
The traditional deadlift needs your feet roughly shoulder-width apart for a stable and efficient platform. If the sumo deadlift feels more comfortable, take a stance much wider than shoulder-width. In either case, get the barbell over the center of your feet, not in front of your toes and never touching your ankles.
Step Two — Pick Your Grip
Unless you’re a competitive strength athlete, use a double-overhand grip (each palms down), with or without lifting straps depending in your must develop grip strength. Squeeze the bar hard even in case you are using straps. Keep your arms straight throughout the whole exercise.
Step Three — Brace Your Core
Start your brace before the load leaves the bottom. Maintain a 360-degree braced core throughout the whole rep, through the lifting and lowering phases. A powerful brace will reinforce power transfer out of your lower to upper body and help to maintain your back in a neutral position.
Step 4 — Lift the Barbell
Get tight before the load even leaves the bottom and stay tight throughout the whole repetition. Keep your feet flat and take into consideration performing a leg press to drive the load up. Because the bar passes your knees, imaging doing a hip thrust to activate your glutes and lock out the load in a standing position.
Step Five — Lower with Control
After you’ve locked out the load, quickly refocus and lower the load at a deliberate, not excessively slow, pace. Avoid dropping the load without tension. The bar should find yourself where it began, above your midfoot. Pause briefly in the underside to settle the load and minimize momentum. Reset your brace and repeat the method for extra repetitions.
As They Say: Grip It and Rip It
The deadlift can initially feel awkward, especially in case you don’t really know what you’re doing. Even after reading this deadlift technique lesson, it would still feel like there are such a lot of cues to take into consideration. But like every exercise, learn it right as a substitute of getting to learn it twice. With some practice, it’ll grow to be second nature. Eventually, getting a great setup will take just a couple of seconds and resetting between reps will take even lower than that. From there, you may construct a large deadlift and dominate the world (or simply hit a PR. That’d be good, too).
References
- Kapicioglu, M., Bilgin, E., Guven, N., Pulatkan, A., & Bilsel, K. (2021). The Role of Deadlifts in Distal Biceps Brachii Tendon Ruptures: An Alternative Mechanism Described With YouTube Videos. Orthopaedic journal of sports medicine, 9(3), 2325967121991811. https://doi.org/10.1177/2325967121991811
- Cholewa, Jason M, et al. “Anthropometrical Determinants of Deadlift Variant Performance.” Journal of Sports Science & Medicine, U.S. National Library of Medicine, 1 Aug. 2019, https://www.ncbi.nlm.nih.gov/pmc/articles/PMC6683626/.
- Roig, M., O’Brien, K., Kirk, G., Murray, R., McKinnon, P., Shadgan, B., & Reid, W. D. (2009). The consequences of eccentric versus concentric resistance training on muscle strength and mass in healthy adults: a scientific review with meta-analysis. British journal of sports medicine, 43(8), 556–568. https://doi.org/10.1136/bjsm.2008.051417
- Nunes, J. P., Schoenfeld, B. J., Nakamura, M., Ribeiro, A. S., Cunha, P. M., & Cyrino, E. S. (2020). Does stretch training induce muscle hypertrophy in humans? A review of the literature. Clinical physiology and functional imaging, 40(3), 148–156. https://doi.org/10.1111/cpf.12622
- Tayashiki, K., Maeo, S., Usui, S., Miyamoto, N., & Kanehisa, H. (2016). Effect of abdominal bracing training on strength and power of trunk and lower limb muscles. European journal of applied physiology, 116(9), 1703–1713. https://doi.org/10.1007/s00421-016-3424-9
Featured Image: Rocksweeper / Shutterstock